Part 1 - The Visual Editor
Add, Replace or Remove content at the click of a button
With Visually, you can effortlessly personalize almost everything in your store. Here are some simple and quick actions you can take with the visual editor:
1. Navigate to the page(s) you'd like to optimize
2. Edit an existing element or Add a new element
1. Navigate to the page(s) you'd like to optimize
Define whether you want to open the visual editor on desktop or mobile and then use the dropdown list above the Quick Preview to navigate to the page you'd like to edit or enter a Custom URL to manually define the page you want to work on.
We recommend separating out desktop and mobile into two different experiences given the differences user behavior across devices

2i. Edit an existing element
Hover over the element you want to edit until it turns pink, then give it a click! You'll see a friendly dropdown list pop up with some great options for you to choose from:

-
Edit Visual - this will open up a Visual Editor packed with user-friendly editing options that make customizing a breeze.
-
Alternative Text - a quick way to update the test that appears using AI
-
Edit Code - this will open the relevant piece of code, allowing you to modify it.
-
Replace - this will replace the chosen element with a new one right in the same spot.
-
Copy - this will duplicate this element to a new chosen location.
-
Move - this will allow you to choose a new location for an element.
-
Remove - this will hide the element from the page.
2ii. Add a new element

You can add visual widgets:
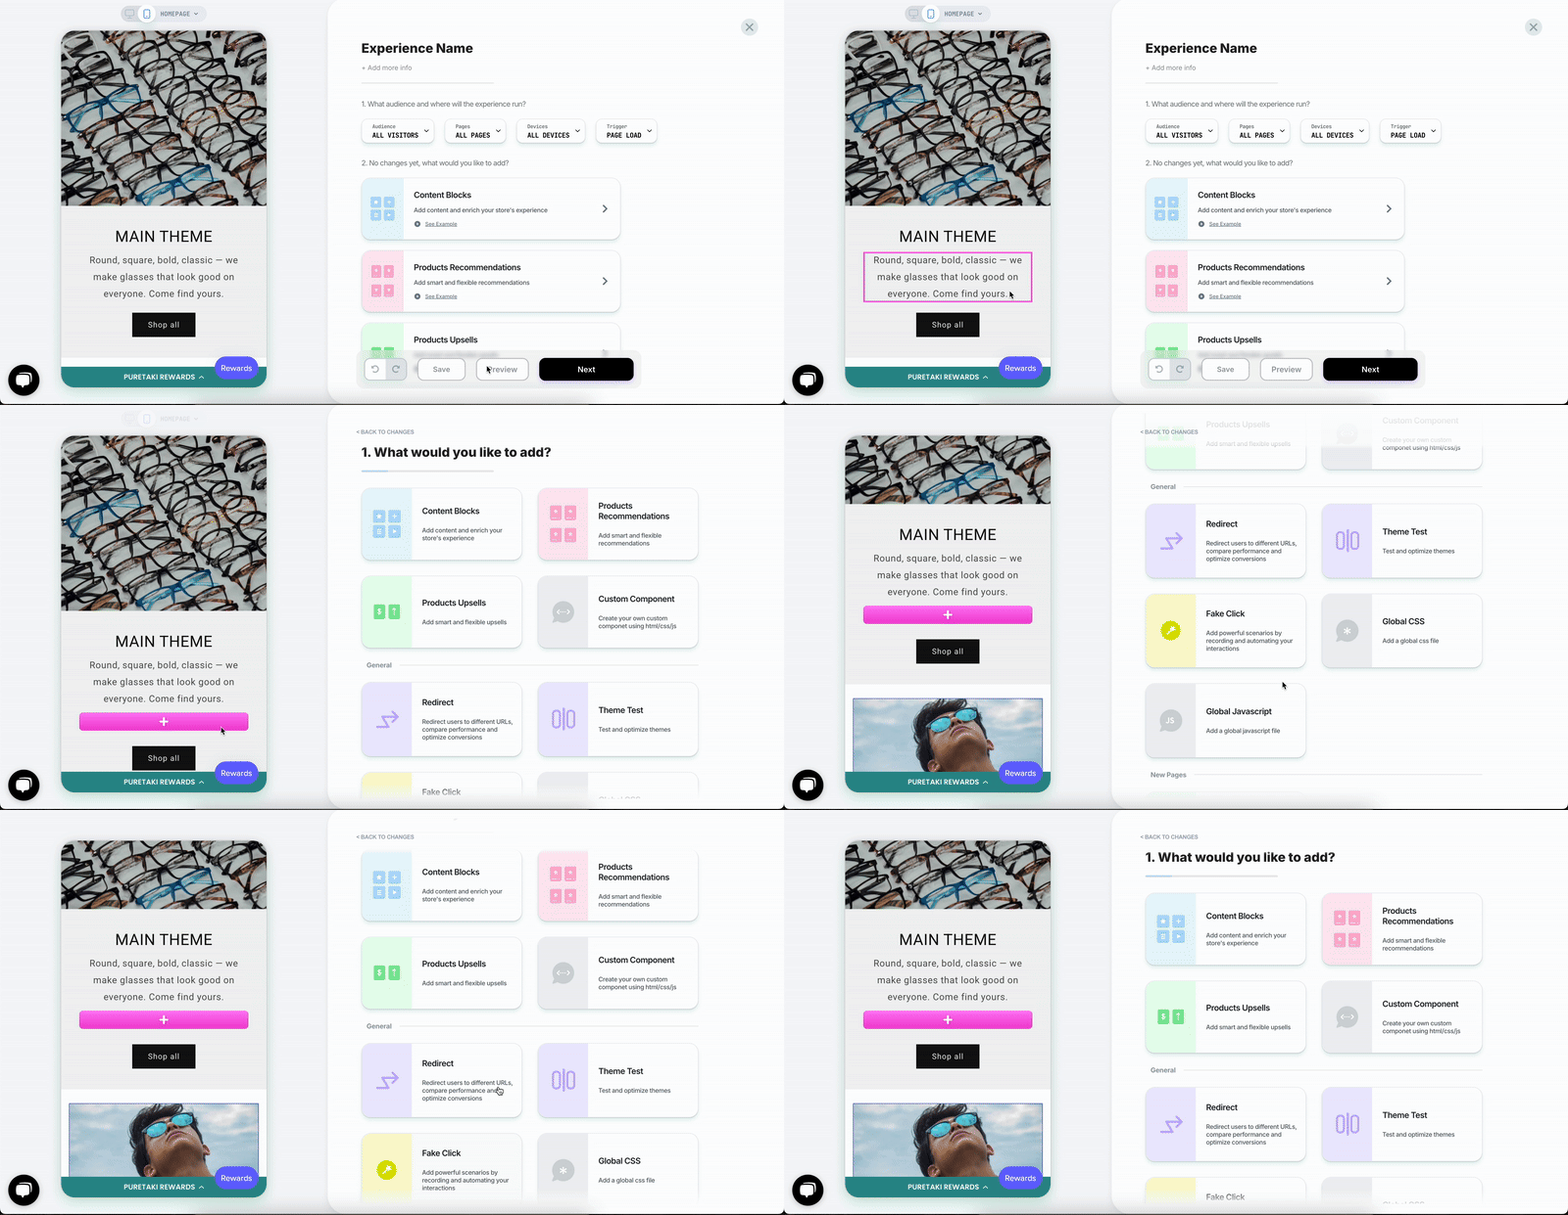
Hover over the adjacent element to where you want to add the new element until it turns pink. Click the top plus sign (+) to add a new element above, or the bottom plus sign to add below.
A pink placeholder will appear in the selected location until you choose the desired widget.
-
Content Blocks - static and dynamic content to enrich the shoppers' experience.
-
Product Recommendations - smart and flexible product recommendations.
-
Product Upsells - customizable upsells to increase AOV and revenue.
-
Custom Component - a customizable element using HTML, CSS, and JavaScript.
Because of how web pages work, your new widget will take on the width of the anchor element and rely on its visibility; it won't show up unless the anchor element is visible too.
So, when you're picking an element to "anchor" your new widget to, make sure to select an appropriate, stable, and reliable element.
You can add a global change:
-
Redirect - reroute shoppers to an alternative URL to find the best performer.
-
Theme test - to test and optimize your themes.
-
Fake Click - record mouse clicks, text input, or automatically scroll to an element on the page.
-
Global CSS / Global Javascript - add a global CSS or Javascript file to the page.
-
Post-Purchase - offer an upsell after customers completes a purchase.
Tip: We offer a wide variety of widgets, building blocks, and features. Our Help Center offers more detailed guides and information for each one.
3. Style the content
When you add a new widget, you have the flexibility to tailor it to align with your brand's identity. Simply click the 'Customize' button to expand all the styling options available for your widget. You can also 'save' the style and reuse it in future experiences as well as edit existing styles.

4. Edit your change(s)
Each change in the experience will display on the change log section. Simply click on a change or the ellipsis to open additional widget edit options.

Clicking on the ellipsis will offer several options, depending on the type of change:
-
Add Before/After - add another widget before/after the selected change.
-
Duplicate - duplicate the existing widget (you'll need to choose a new location for the duplicated widget).
-
Replace Position - move the widget to a new location.
-
Copy CSS Selector - copies the CSS selector of the selected widget to the clipboard.
-
Rename - this helps you keep track of everything when there are many changes in the experience.
-
Copy to Desktop/Mobile - duplicates a change to be applied on the other device.
-
In order to edit the new change, you'll have to switch the preview window's device.
-
-
Target All Devices - this will apply the current change to all devices.
-
In this case, when you make changes on one device, they'll automatically apply to the other too. Therefore, it's a good idea to do a quick check on both devices, even if everything looks the same, to ensure consistency and functionality across platforms.
-
-
Delete - this will delete the change permanently.
-
You can also use the eye icon to hide the change without deleting it.
-
-
Upgrade to latest - will convert an older widget to its new version.
-
The upgraded widget might need a quick review before you republish, as these updates can sometimes tweak the widget's settings or style a bit.
-
This is mostly relevant for older experiences that might still be using outdated code.
-
